The Login preset
The Login preset builds a ready sign-in form for your site: a visitor enters a login and a password, the flow verifies them and remembers the person. The article walks through every step: where the preset lives, what each field of the options window means, what the assembled diagram looks like, and what to check after generating.
Sign-in is the backbone of closed sites: a personal account, a club, a knowledge base behind a subscription. The preset covers it end to end; what is left for you is choosing where members are stored and drawing the sign-in form.
Where to find the preset
Open the “Site” section in the admin and enter any flow (or create a new empty one); the toolbar above the canvas has the “Presets” button. In the gallery the “Login” card stands second, right after “Page”.
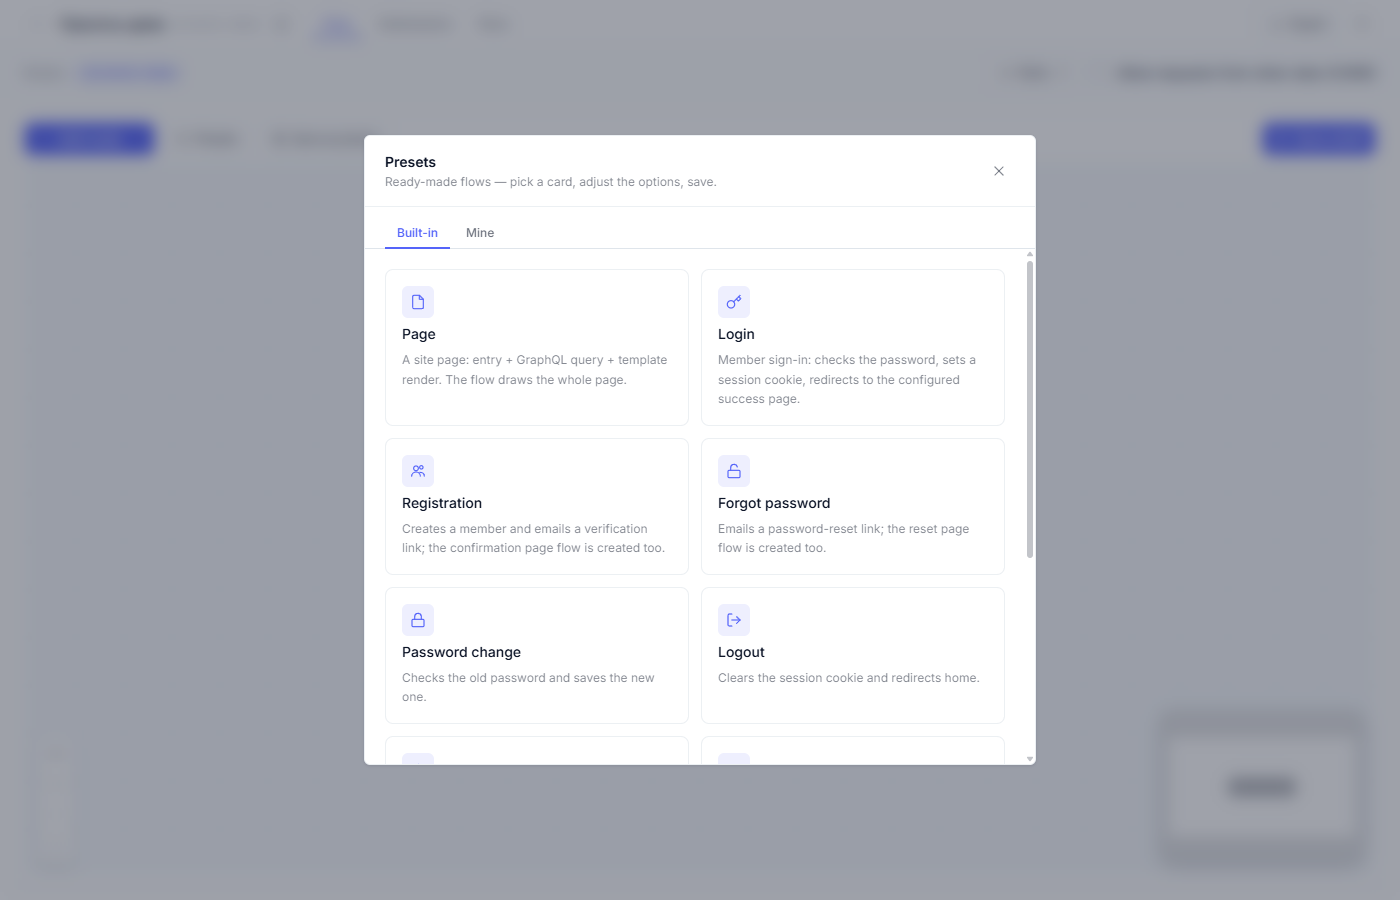
The card carries a book icon in the corner; it leads to this article whenever you need to refresh the steps.
What the preset builds
After generating, a chain of six nodes appears on the canvas:
| Node | Role in the flow |
|---|---|
| Start | The entry point: requests from the form arrive at the flow route |
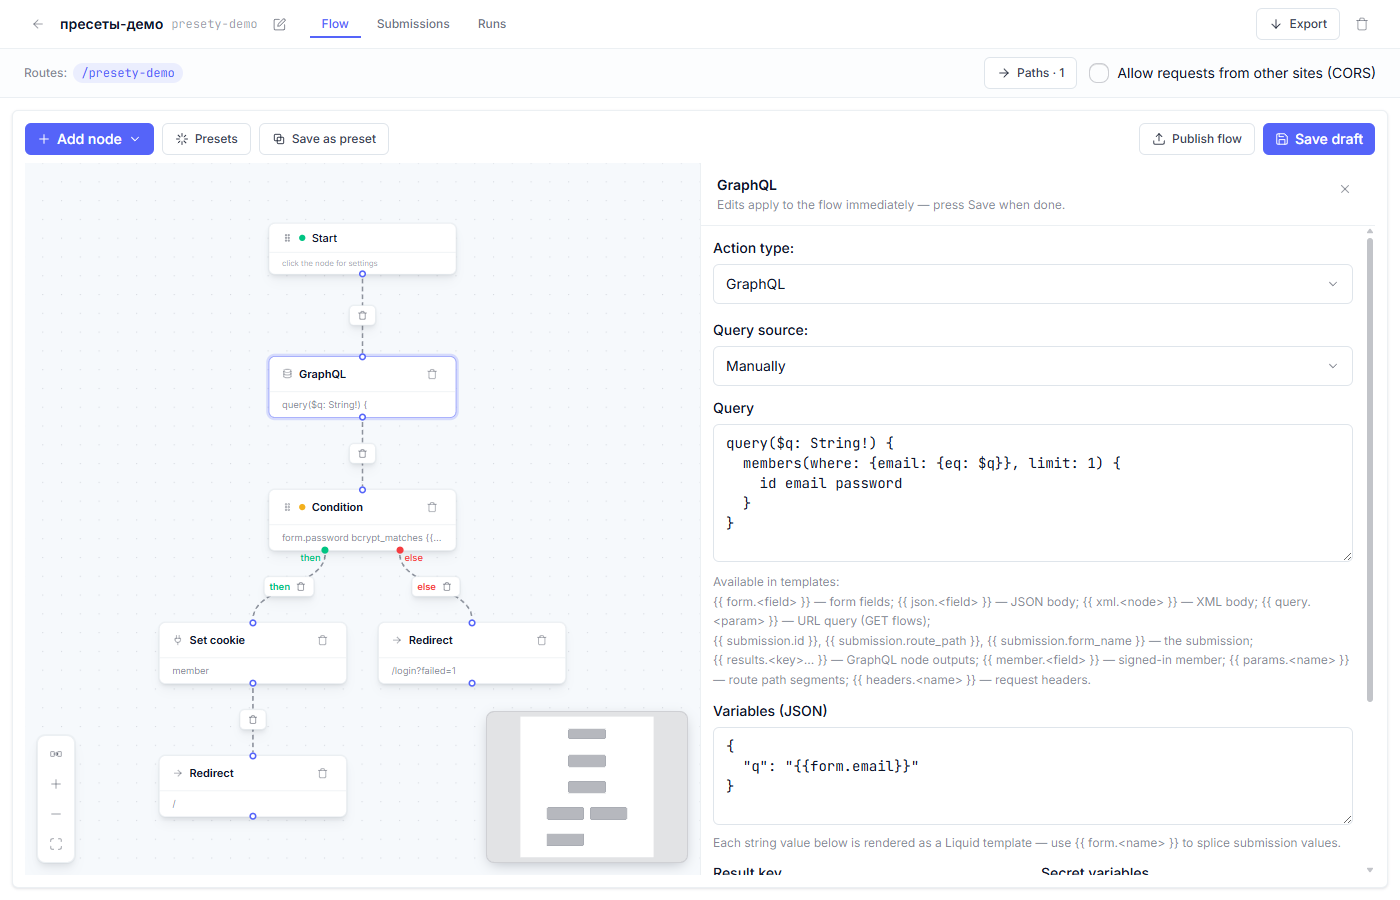
| GraphQL | Find the member by the login from the form |
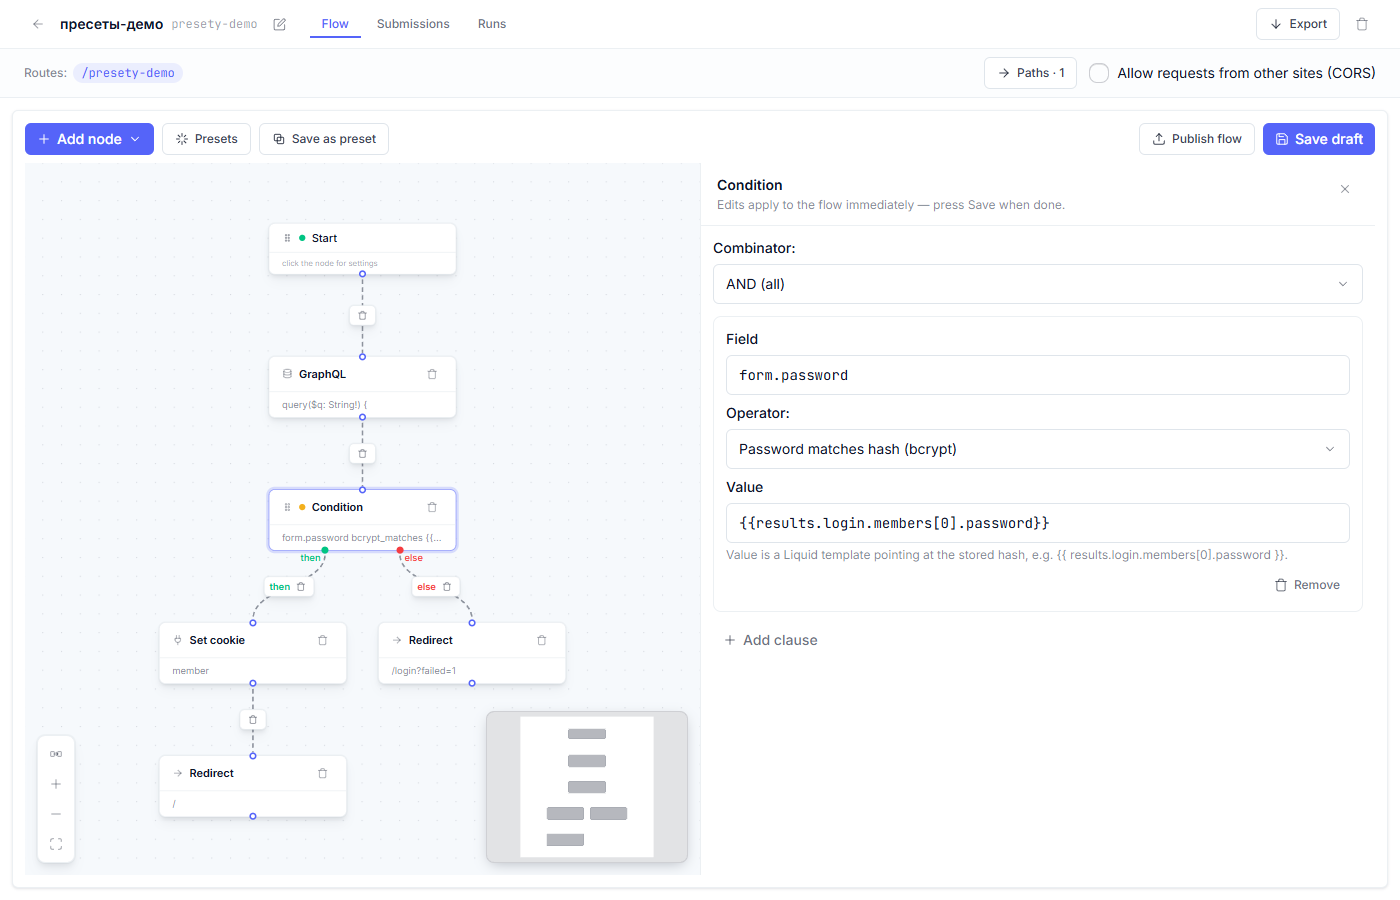
| Condition | Compare the password from the form with the member’s password |
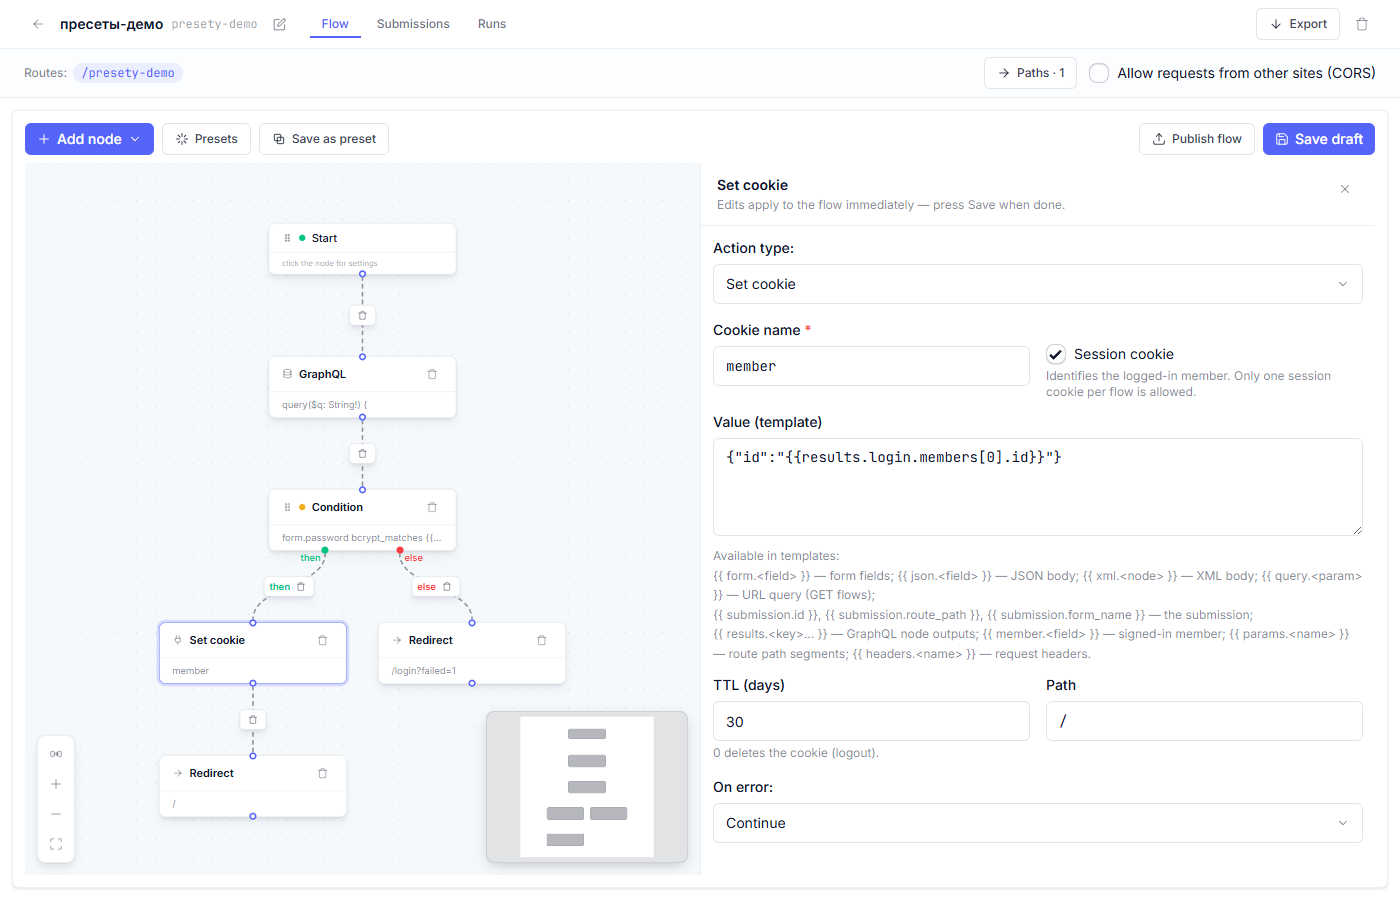
| Set cookie | On a correct password, remember the person |
| Redirect | On a wrong one, send the visitor to the error page |
The second redirect (after the cookie) leads to the success page; that is where a signed-in visitor lands.
Step by step
1. Open the options window. Click the “Login” card, and the platform asks about members, the form, and the session.
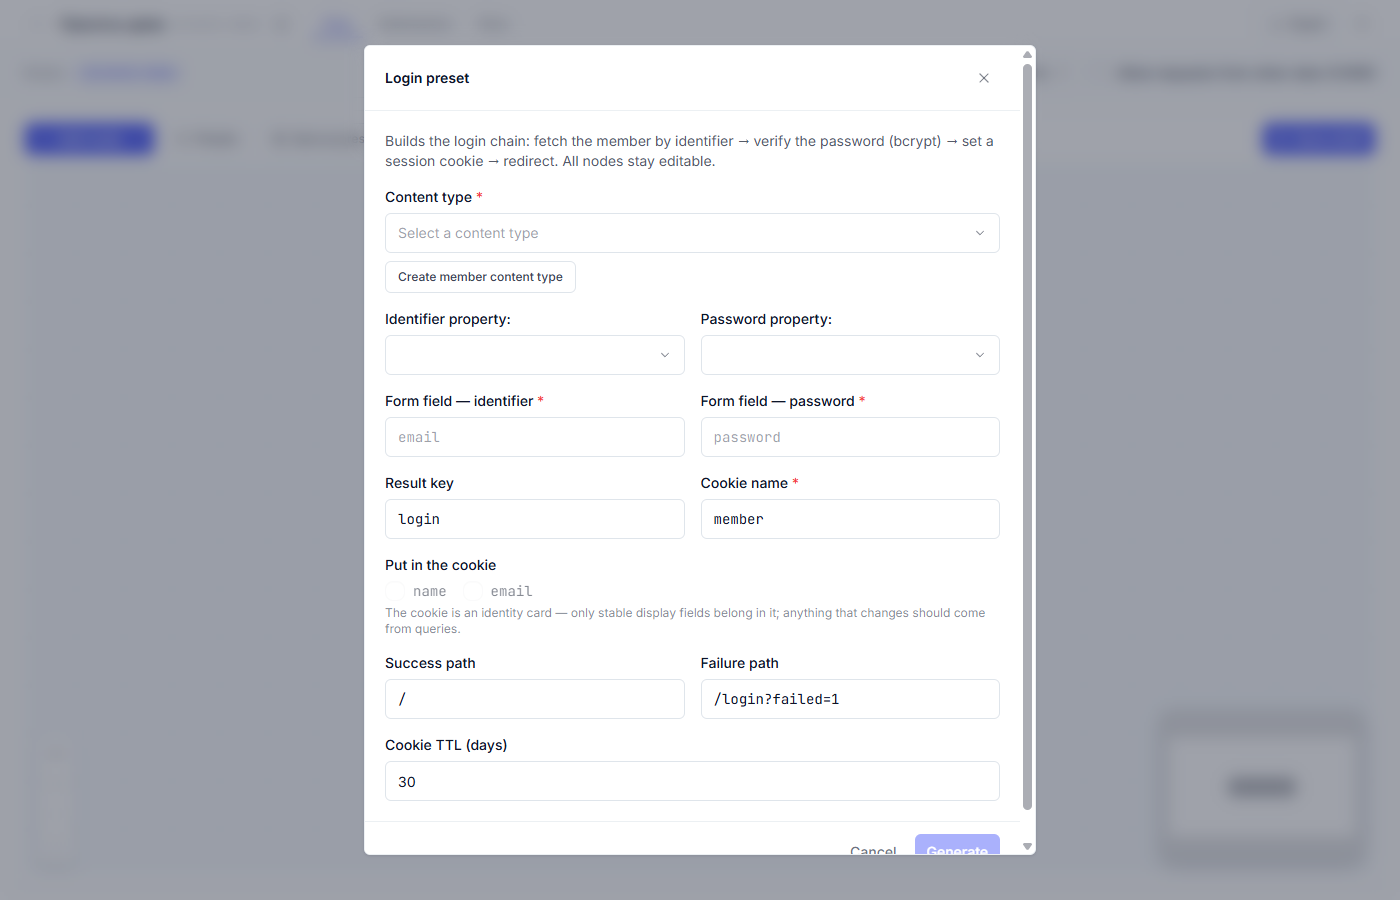
2. Choose the member content type. A member is a person with an account on your site, and a content type is the “card” with fields where they are stored. If there is no suitable type yet, press “Create member content type”: the platform builds a type with login and password fields for you.
3. Pick the login and password properties. The identifier property is the field a member is found by (usually the email); the password property is where the password is kept. Passwords are stored irreversibly: instead of the password, only its “fingerprint” is kept (bcrypt, the standard mechanism for passwords), so even the site owner cannot read it. The flow compares the input against the fingerprint.
4. Match the form fields. The names email and password must match
the name attributes in your sign-in form markup; the flow receives the
entered values through them.
5. Set up the session. The cookie name (member by default) and the
fields that go into the cookie. A cookie is a note in the browser by which
the site recognizes a signed-in visitor on later visits. Keep only stable
display fields in it, for example the name. The cookie lifetime is 30
days by default.
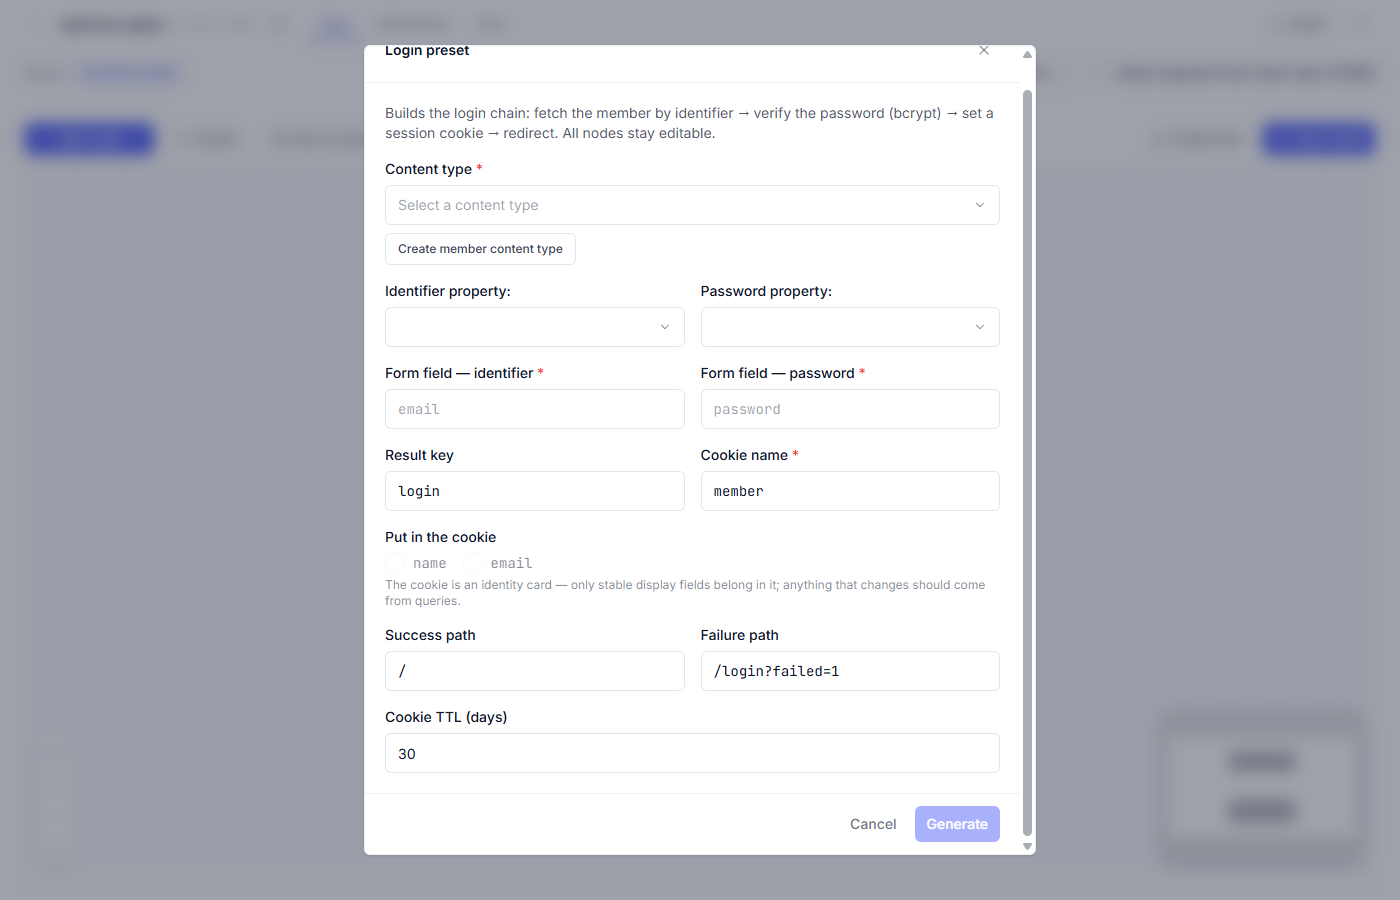
6. Set the success and failure paths. Success is where to send a visitor
after sign-in (/ by default); the failure path usually returns to the form
with a marker (/login?failed=1) so a message can be shown.
7. Press “Generate”. The diagram lands on the canvas.
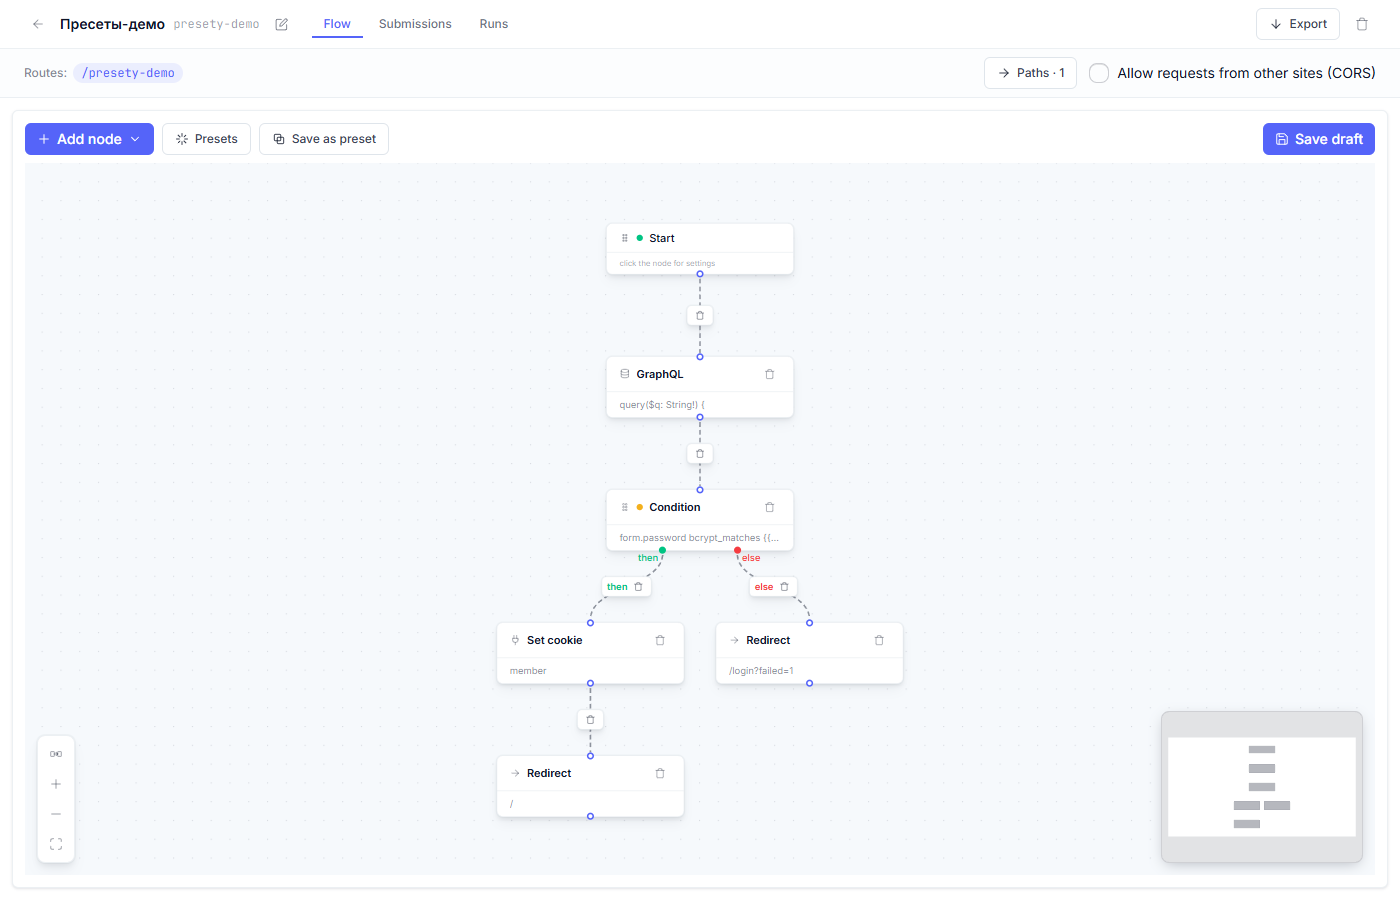
If the canvas already has a diagram, the platform asks “Replace flow?”; nothing changes until you confirm.
Inside the nodes
Every node stays an ordinary editable node. Let’s look into the three most important ones.
The GraphQL node looks up the member: the query takes the login from the
form ({{ form.email }}) and asks the CMS for a record with that
identifier.
The Condition node compares the password: a bcrypt comparison function receives the password from the form and the fingerprint from the record. A match goes down the “yes” branch, a mismatch goes down “no”.
The Set cookie node starts the session: name, contents, and lifetime in days.
What to check after generating
- The form on your site sends the data with a POST request to the flow route; the preset creates the binding itself.
- “Save draft” → “Publish flow”: without this the site notices nothing (details in “Draft, preview, and publish”).
- Closed pages: enable “Members only” on the “Start” node of their flows, and the pages will not open without a valid cookie.
- Sign in with a test member and walk both paths: the correct and the wrong password.
Fine points
- A sign-in error does not say what failed to match, the login or the password. This is deliberate: it prevents guessing other people’s accounts.
- The cookie lifetime is a balance: 30 days is convenient for people, and sensitive sites should set a shorter term.
- For a “Log out” button, apply the Logout preset; it clears the same cookie.
- The “Result key” field (
loginby default) is the name under which the lookup result is visible to the following nodes. Change it only if the nameloginis already taken by one of your queries.
Frequent questions
| Question | Answer |
|---|---|
| Where do members come from before the first registration? | Create records in the member content type manually, or apply the Registration preset; it creates the member itself. |
| The form submits, but sign-in always fails | Check that the form field names match (step 4) and that the member’s password was set through the platform (a fingerprint, not plain text). |
| Can I have two member types with separate sign-ins? | Yes: two flows with this preset, each with its own content type and its own cookie name. |
| How do I limit the session to a week? | In the options window, set “Cookie TTL (days)” to 7 and generate again, or fix the cookie node on the canvas. |
Next article: Registration preset →
See also: Your First Flow in 10 Minutes · Action nodes: what each one does