The JSON endpoint preset
The “JSON endpoint” preset turns an address on your site into one that answers with JSON data: a mobile app, a script or a partner’s robot pulls the data without any HTML. The article shows the assembly, the response expression, and how to serve live data from the CMS. Almost a ready-made external API: CMS content, no server code.
A JSON endpoint gives your data a second life: the same records the pages draw are served in their raw form. This is how mobile apps, widgets and automations integrate with a site.
Where to find the preset
Two ways: the preset gallery in the editor (the admin → “Site” → a flow → “Presets”) or the “Start from a preset” field in the flow creation dialog — “JSON endpoint” is one of the three simple options there.
What the preset builds
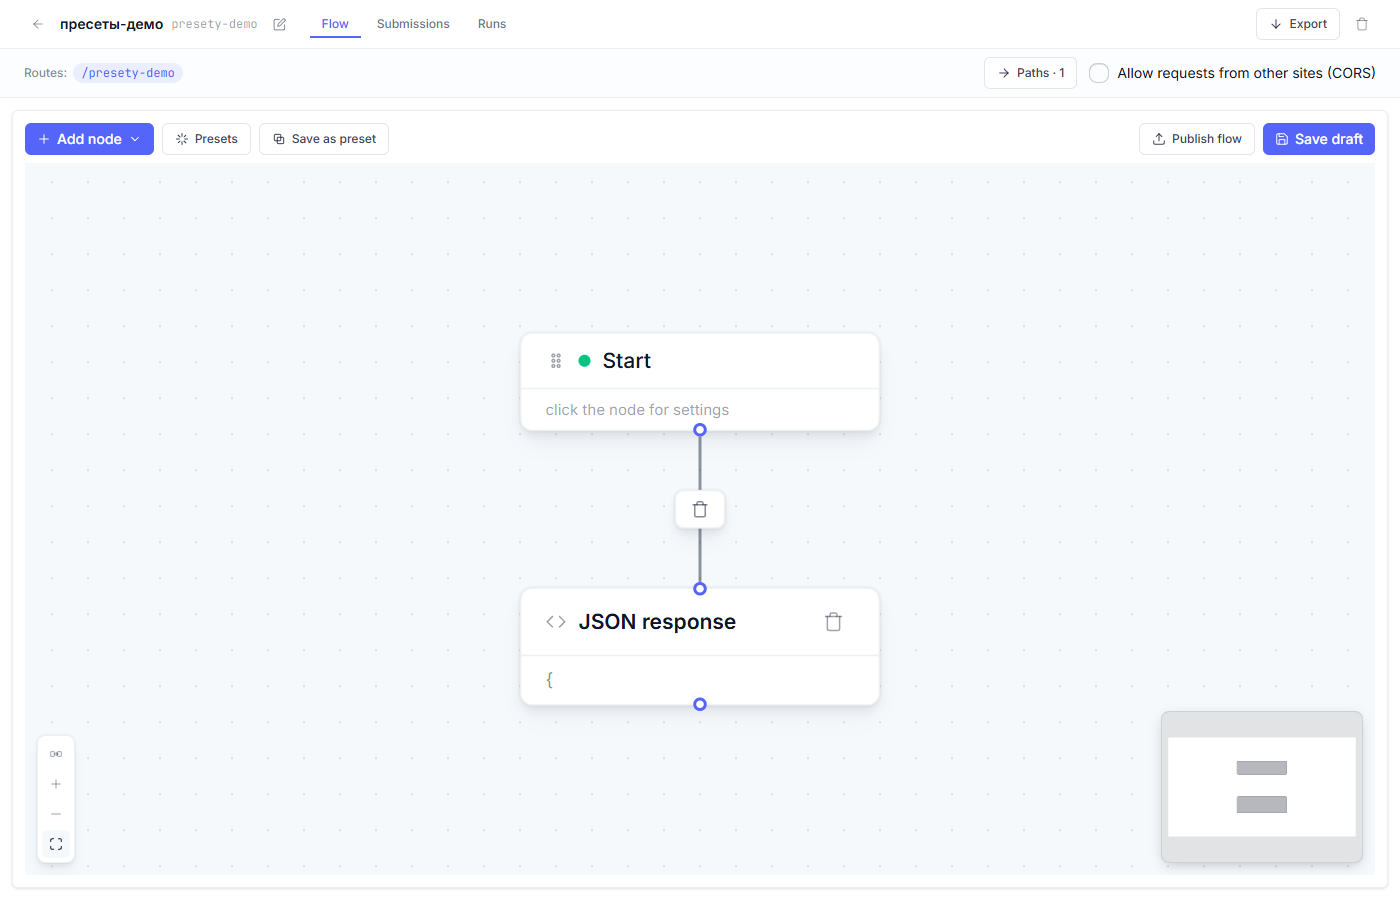
There is no options window: the card lays a pair of nodes on the canvas right away.
| Node | Role in the flow |
|---|---|
| Start | A request to the flow’s route starts the chain |
| JSON response | Answers with a JSON body computed by an expression, status 200 |
Step by step
1. Generate the diagram by clicking the card (on a non-empty canvas the platform asks “Replace flow?”).
2. Open the “JSON response” node. By default it answers {"ok": true}
with status 200 and Content-Type: application/json; charset=utf-8.
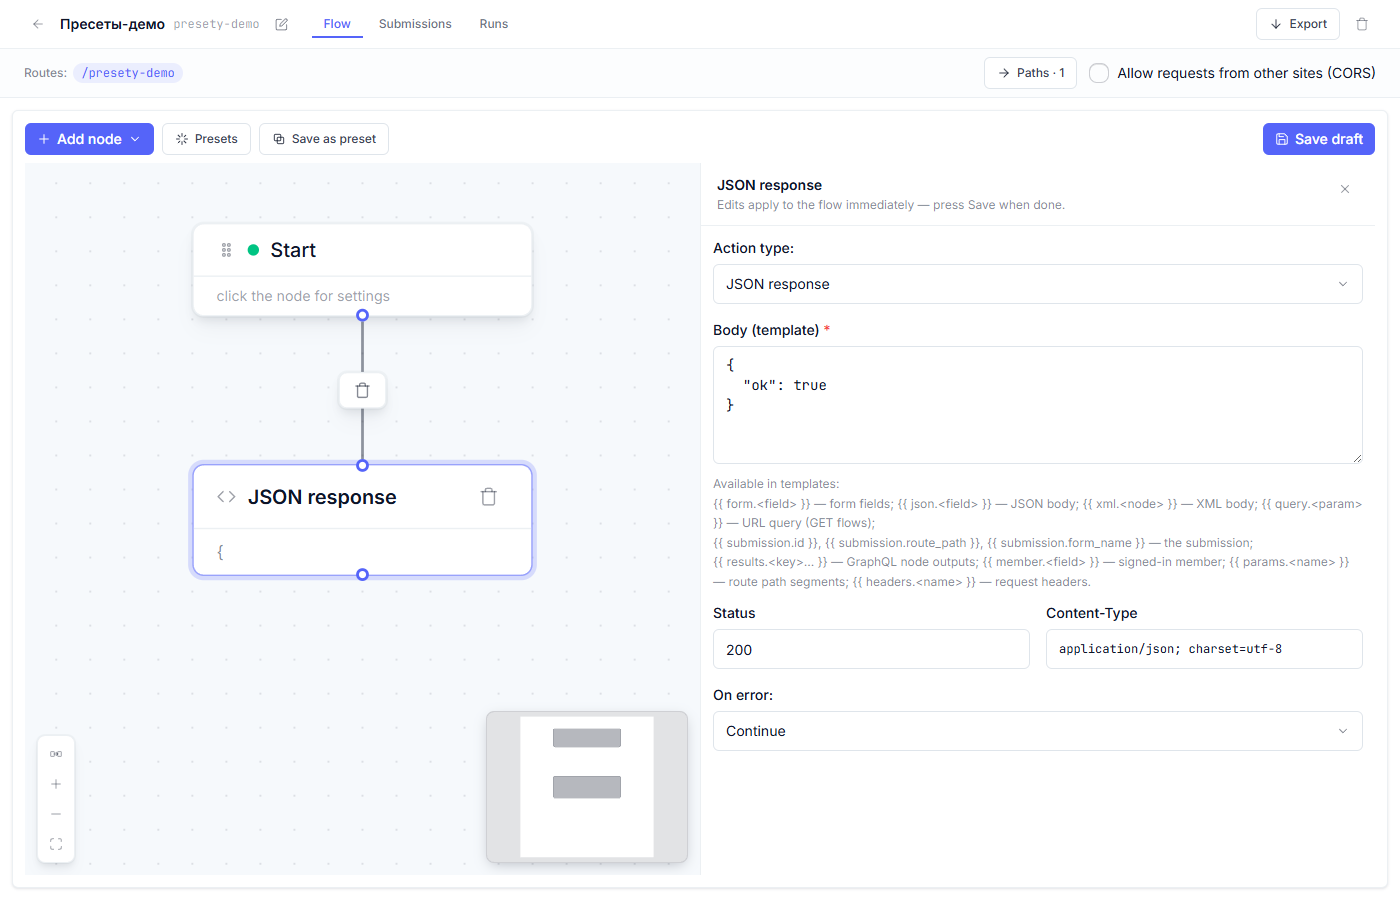
3. Edit the body expression. It is an expr expression: its value is
JSON-encoded as data — broken JSON is impossible. Request data
(json.<field>), replies of GraphQL nodes (results.<key>…) and link
parameters (query.<param>) are all available — the exact syntax, with
examples, is in “Action nodes”. For example,
{ ok: true, page: number(query.page) ?? 1 } on /api/services?page=2
answers {"ok":true,"page":2}.
4. Feed the diagram some data. To serve records from the CMS, add a
GraphQL node before the response (“Add node” → GraphQL) with a query
against your content type — the result lands in results.<key>, and the body expression serves it
(for example, { items: results.<key>.books }).
5. “Save draft” → “Publish flow” (“Draft, preview, and publish”).
How it looks from the outside
After publishing, the flow’s address (for example /api/services) answers
with a JSON body to any GET request. You can check it right in the browser,
or:
curl https://your-site/api/services
Link parameters are available in expressions as query.<name>:
/api/services?page=2 → number(query.page) ?? 1 — that is how paging and
filtering are done.
What to check after generating
- The reply really is JSON: in the browser you see a body with no HTML wrapper around it.
- The status and Content-Type in the node match what the consumer expects (a mobile app usually expects 200 and application/json).
- Data from the CMS is substituted (if you added the GraphQL node).
Fine points
- The JSON endpoint answers ordinary GET requests and does not create a POST binding on the route.
- Errors are better served to the consumer by the same node with a different
status: duplicate a “JSON response” node on a condition branch with status
404 and the body
{"error": "not_found"}. - If the endpoint must be private, keep the address to yourself and check a secret query parameter with a condition before the response.
Frequent questions
| Question | Answer |
|---|---|
| The reply is text with quotes, not JSON | The node still holds an old template body: since v1.4.16 substitutions are removed from the “JSON response” “Body (template)”, and such text goes out verbatim. Move the response into “Body (expression)” — the value is encoded as data, broken JSON is impossible. |
| How do I serve a whole list of records? | A GraphQL node before the response + the body expression { items: results.<key>.books } — the list is embedded as data; the rules are in “Action nodes”. |
| Who can read the endpoint? | Everyone who knows the address. For private data, add a condition before the response that checks a secret URL parameter. |
| How is this different from the “Site” plugin? | The “Site” plugin draws HTML pages; the JSON endpoint is the same mechanism with a machine-readable answer. The two are often used together: the site for people, the endpoint for apps. |
Next article: The “Captcha form” preset →
See also: Action nodes: what each one does · Routes: how a visitor reaches a flow